The alternative miss world is a big event in most peoples social calendars, but you don't attend wearing a suit and tie like you would for most important events. This is where I generated my idea from. I wanted to take usual high class dress and make it more fun and playful. This means top hats, fascinators and ties. I'm going to begin by looking at fascinators as I have seen some over the top ones worn by multiple celebrities to important events. I'm going to look into just how crazy these fascinators get, and if I can recreate this myself using simple techniques.
Wednesday, 28 January 2015
Tuesday, 27 January 2015
Building my first puppet from scratch!!
Building a puppet offered fewer problems than I thought it would before I began. Building the wire frame was quite simple, despite look complicated. The part that was rather challenging was,asking sure that the upper and lower jaw of the bird matched each other perfectly as without this the puppet would not work as easily as it should.
 Early on sketches done on my iPad showed how I wanted the finished piece to look, although they are not technical drawings I always find it useful to get down on paper exactly what you want something to look like as it gives you an end goal. I also sketched out how the mechanism on the inside of the puppet would look and work just incase I wanted to have something to refer to at a later stage.
 After creating the frame it was time to create the blinking mechanism. Which I found online on YouTube. I found this video extremely useful as it showed how to create the blinking eyes for the puppet easily using ping pong balls and wire.


I built the frame from wire as it is easy to manipulate as well as being incredibly lightweight. The piece being light is important as it needs to be comfortable to be used by a performer for long periods of time. Not only this but it always easier to operate when it's lighter as well.
Early on sketches done on my iPad showed how I wanted the finished piece to look, although they are not technical drawings I always find it useful to get down on paper exactly what you want something to look like as it gives you an end goal. I also sketched out how the mechanism on the inside of the puppet would look and work just incase I wanted to have something to refer to at a later stage. After creating the frame it was time to create the blinking mechanism. Which I found online on YouTube. I found this video extremely useful as it showed how to create the blinking eyes for the puppet easily using ping pong balls and wire.
The mechanism was easy to use and simple to construct and I will use it again if I ever need to create the same effect again on another piece. The only issue i did encounter was fitting the eyelids to the eyes as the fabric sewn to the wire frame to create the blinking lids would effect the eyes ability to open and close if it was too thick. I therefore had to change my use of fabric to accommodate this. I used a thinner material than I had intended.
Once the piece was fully built I coveredit with natural feather and extra fabric hand sewn to the frame to finish the piece. I was really happy with the end results and would like to try my hand at making more complexed puppets in the future as I found this one relatively simple.


Friday, 23 January 2015
Thursday, 22 January 2015
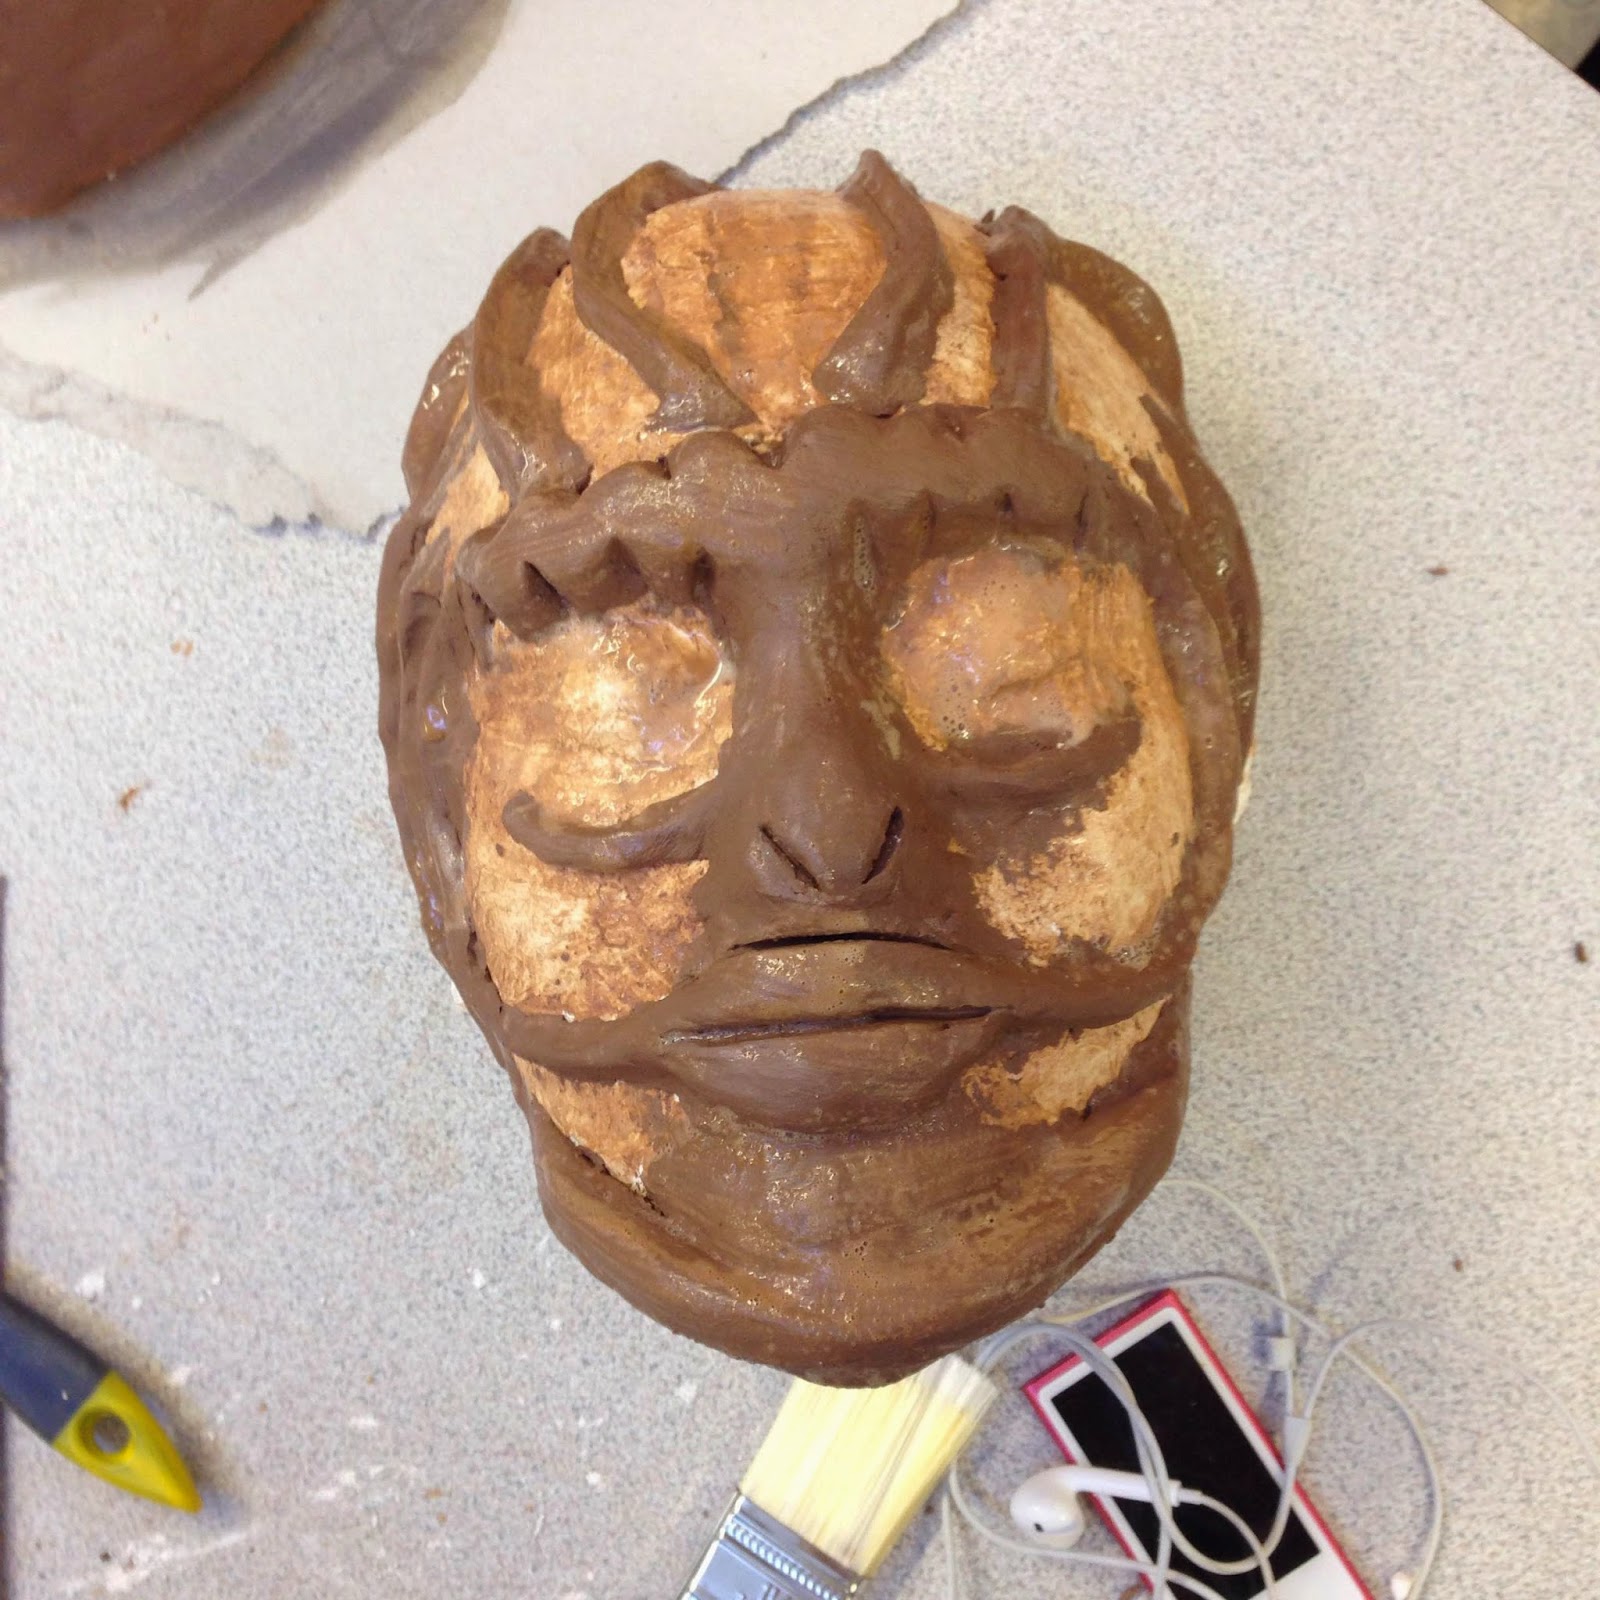
The wo(man) behind the mask. . .
Working in latex is something completely new to me, and therefore a challenge that I was more than happy to undertake.
After creating a block of my face, by first getting an impression using plaster bandage and then filling this with plaster, the sculpting of the features could begin. Building up key parts of the face with clay to create something that bares as little resemblance to my face as possible.

 I decided to make my mask a person make of leaves and vines. This idea sprang to mind whilst looking at folk art as I started thinking about all the things around my home town that make it the place it is. The first thing of thought of was Sherwood forest, which is just a stones throw away. And long story short, that how the idea for my mask happened.
 After multiple tedious layers of latex my mask was off the starting block. Another layer of coloured latex (green) as well as some extra detail added using wire, cotton and tissue paper and voila! ITS FINISHED!

 For my first ever attempt at making a mask using latex, from scratch, I am quite proud of the outcome. Although I clearly have a lot to learn about relevant techniques for the material I think my first stab was a good go. Not only this but next time I would like to try making my block using alginate instead of plaster bandage and plaster as alginate picks up a great deal more detail that other techniques.
After creating a block of my face, by first getting an impression using plaster bandage and then filling this with plaster, the sculpting of the features could begin. Building up key parts of the face with clay to create something that bares as little resemblance to my face as possible.
I decided to make my mask a person make of leaves and vines. This idea sprang to mind whilst looking at folk art as I started thinking about all the things around my home town that make it the place it is. The first thing of thought of was Sherwood forest, which is just a stones throw away. And long story short, that how the idea for my mask happened.Wednesday, 21 January 2015
Testing Larry the lamb


All in all I'm really happy with the piece I ended up with, not only is it functional and easily operated it was all created using simple materials just like pieces of folk art. This piece could easily be created by a member of the public, which is essentially what folk art is! Art that can be created, understood and appreciated by the general public, not just pretentious 'arty farty' types.
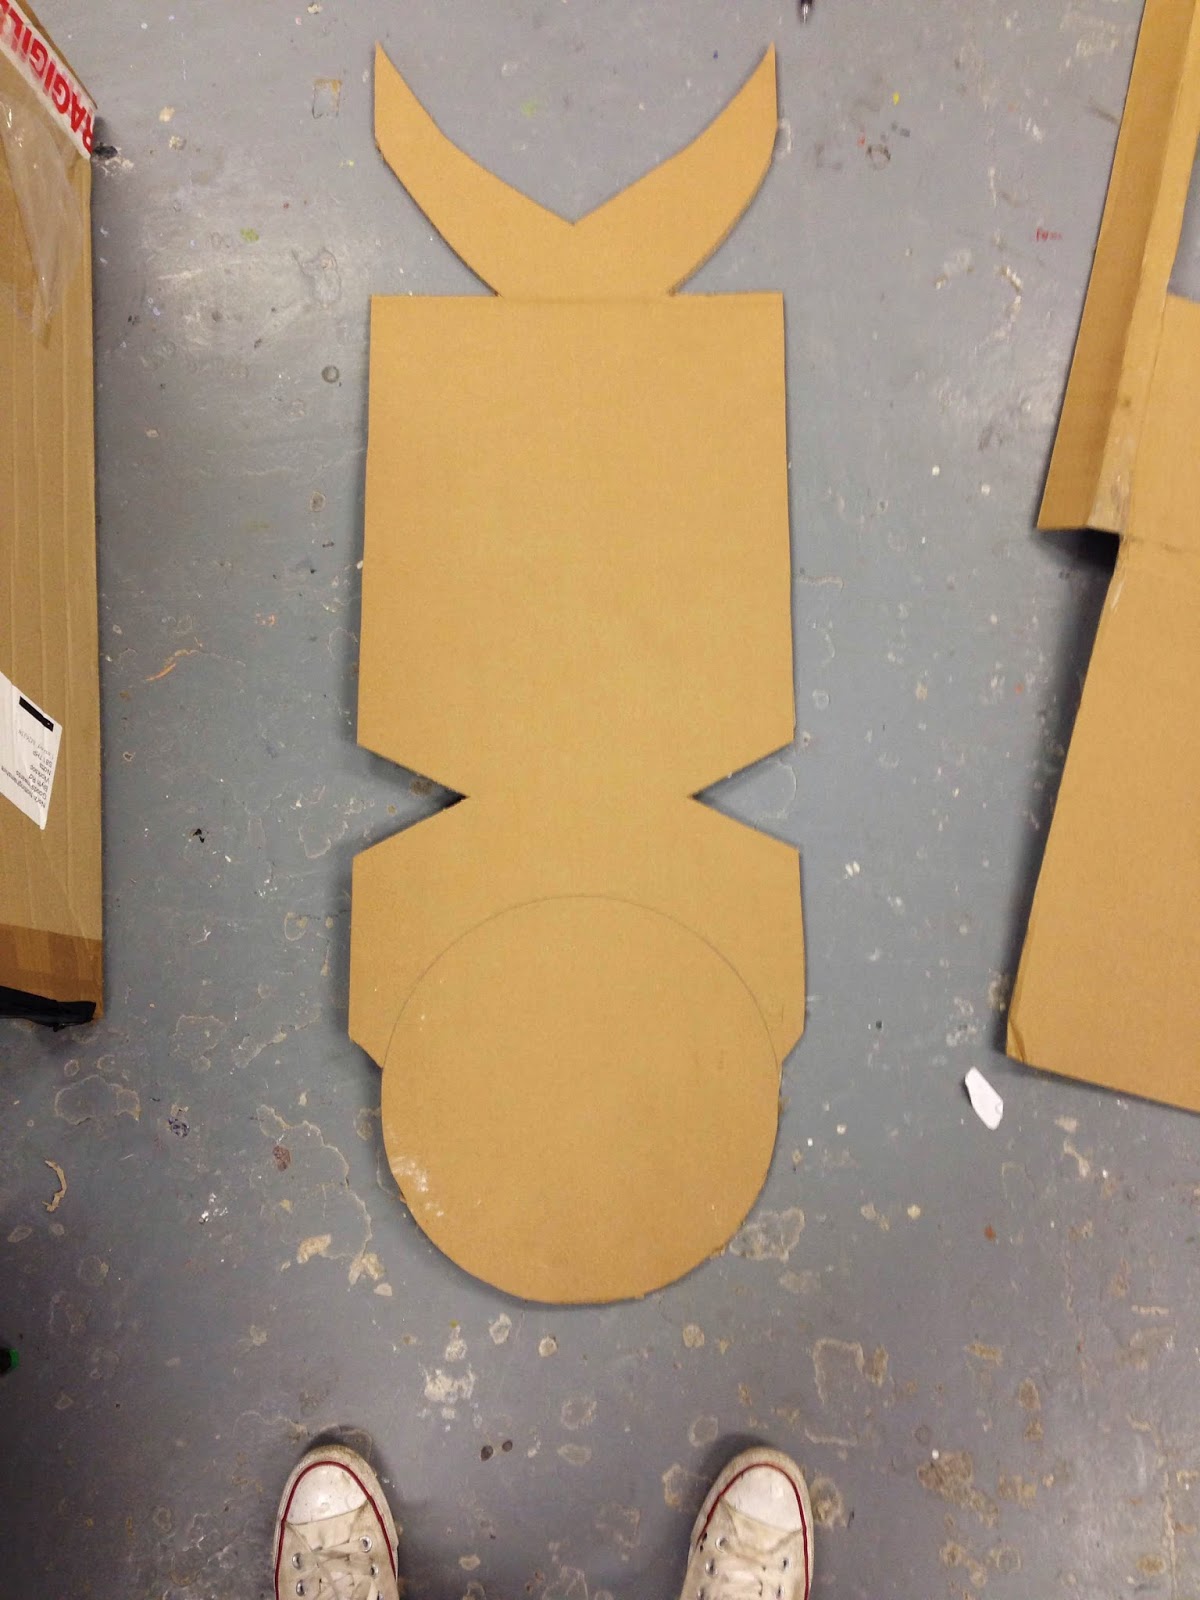
The birth of Larry the lamb
Puppets can be made out of from a sock to a complex piece of machinery using hydraulics. After looking at mummers plays as part of my folk art research, I noticed they often use puppets to represent countryside animals in the plays. On a YouTube video of a performance I saw a puppet of a ram. This inspired me to create one of a sheep using simple materials.

 I began by creating the basic animal shape from a flat piece of cardboard, I learnt from this process that when creating things such as props, accuracy with measurements is important as if they are wrong then your whole piece is built off of unstable foundations.
The simple mechanism I used for the opening and closing of the mouth was a wooden pole feeding through the bottom jaw and up through the inner mouth to be secured onto the top jaw. This allowed for the mouth to be opened without being noticeable from the outside.

 The box was then covered with small strips of white material, I liked this as it added more movement to the costume when in use. Although cutting and gluing all the strips individually was a long process I think it was worthwhile as I achieved movement that I wouldn't have done if I'd have just applied cotton wool balls like I was going to initially do. It also made the work similar to the traditional pieces as they usually use long lengths of cloth to depict fur.
Once the head was complete it was time to build the framework to cover the body and support the head, which was going to be a difficult task due to the majority of the weight being high up in the costume. This meant in order to counter balance the extra weight, but keep full movement, I have to build further down onto the shoulders.
I did this by stripping out the inside of a hard hat to attach to the underside of the animals head. The helmet was then secured to the performer using a strip of elastic u


All in all I think the piece was a great success, inspired by traditional folk art. If I were to make the piece again I would use a different material to cardboard for the bulk of the costume, such of chicken wire. Although using cardboard meant the piece was kept lightweight once completed.
Friday, 16 January 2015
Joining the tribe - Creating a mask of Gnoumou
In response to looking at work by Charles Freger, I began looking into cultures that use costumes to represent animals for the purposes of performance. The Gnoumou tribe create elaborate masks on a large scale, accompanied by intricate costumes to celebrate young boys in the tribe becoming men. That look like the following image.
 For some unknown reason, I decided that I was going to make one of these. Despite the fact that after researching I read how they take months on end to prepare, I've given myself two weeks. Damn it.
The easy bit was creating the shape of the mask. After measuring out the scale and proportions to be similar to the original traditional masks.

After the creation of the general shape, I gave the piece a layer of black acrylic to create a base layer and a 'blank canvas' to begin my design onto.

The pole runs fully up the back of the mask to distribute weight as the majority of the mask will be above head height. This makes it more comfortable for the performer to work in. After strengthening the back with additional cardboard in the weaker spots the mask has become more fit for purpose.
 In order to create the head dress section of the costume design I decided to hand thread a wig using standard knitting wool and a whole bucket of patience. In hind sight I should have tested the method, and how long the process would take as I would've realised its a very lengthy process and not easily achievable in the time frame I set myself.
bringing all these elements together should allow me to create a design closely similar to the actual thing.
I decided I needed to work onto the mask to make it 3D as without this the piece loses impact. Using chicken wire and paper mache' I was able to create my desired beak like shape.

 although on reflection it is too large in scale for the rest of the mask so I will have to take it off from the piece and then reattach it using wire and a glue gun in order to make it secure. However I am pleased with the shape and stability of the beak.
More posts documenting the progress of the mask will be posted. . . keep your eyes peeled people!
Subscribe to:
Posts (Atom)